The term ‘truffle’ derives from the Latin word tuber meaning ‘lump’. While ‘truffles’ can refer to a variety of chocolate confectionaries, I am making my Belgian chocolate truffles from a centre of butter and chocolate praliné which I then coat in chocolate flakes.
They are the perfect chocolates for sharing and when I present them housed in a homely decorative box, they make a wonderful gift.

The batch I am writing about today was made as a gift for my friend at her wedding.

Why not keep up to date with all of our chocolate recipes and projects by signing up for our free updates (no spam)!
BELGIAN CHOCOLATE TRUFFLES
If you’re making truffles, there’s little point in making one box. Each step in the process of making them requires a little bit of organisation, so if you’ve got everything set up, you may as well get a few boxes worth out of it. If you end up with an extra box, there will always be someone there to take it off your hands.
WHAT YOU’LL NEED – INGREDIENTS:
→ butter (125g)
→ praliné (125g)
→ milk chocolate (250g) (preferably Belgian!)
Here’s what you do:
6 EASY STEPS: HOW TO MAKE BELGIAN CHOCOLATE TRUFFLES
We once made a huge amount of truffles in chocolate class. I decided to halve those measurements and I still had 4 boxes.
You can make Belgian chocolate truffles in different sizes, colours and tastes. Making truffles is fun, because you’re not constantly doing the same thing. Here’s what I did:
STEP 1: MELT THE CHOCOLATE
First you melt the chocolate. Do this in a bowl which sits on a pot on the hob (au-bain-marie). Meanwhile, blend the butter until it is airy and soft and then add the praliné. Mix the butter and praliné and make sure you have a smooth substance.

STEP 2: MAKE YOUR TRUFFLE BLEND
When the chocolate is melted, you blend it with the butter and praliné mix. Make sure the temperature of the chocolate is not higher than 45°C.
STEP 3: FILL A PIPING BAG AND SQUEEZE
Next, fill a piping bag with the blend of butter, praliné and chocolate and create small round shapes on some baking paper with a nozzle of either 8mm or 10 mm. Hold the piping bag close to the baking paper and squeeze so the mix forms a round shape around the tip of the piping bag. Make sure the mix doesn’t point up when you lift the piping bag. You can avoid this by making a small circle when you stop putting pressure on the bag. After a bit of practice this will be no problem at all!

STEP 4: COOL YOUR TRUFFLE CENTRES
When you have formed the round shapes, you put them in the freezer or cold fridge. These creations are only the inside of the chocolate truffle. You will have to dip them in chocolate, but they need to be cold to be able to do this. If not, they might melt when you dip them or they might lose their nice round shape.
You can keep up to date with our other chocolate recipes and projects by signing up for our free updates (no spam)!

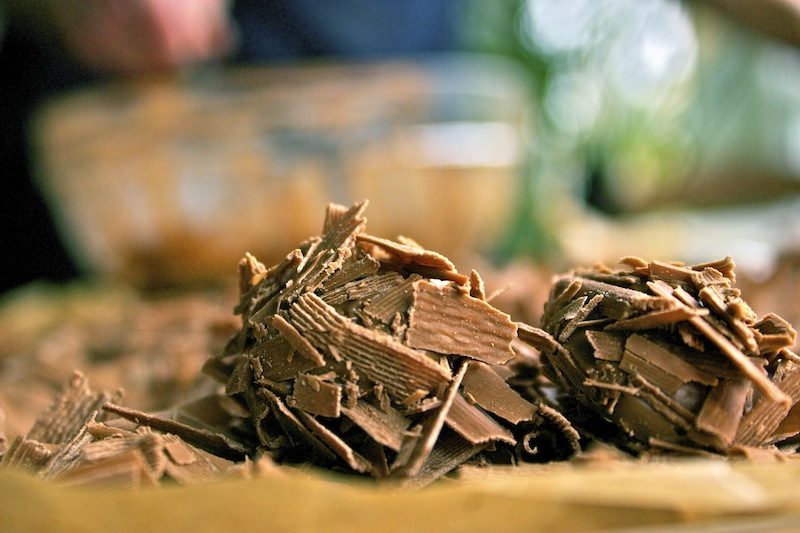
STEP 5: CREATE YOUR CHOCOLATE FLAKES
While the inside of the truffle is in the fridge, you can make the chocolate flakes that will form the outside of the truffle. You can buy them in a shop, but I prefer them homemade.

You’ll need a marble surface to spread out some melted chocolate. Spread it out really thin with a metal scraper and use the whole surface. Let the chocolate harden and scrape it off. If you scrape off the chocolate with just the edge of your scraper, you get small chocolate flakes. That’s what you want!

You can put the chocolate flakes in the fridge to keep them cold and hard until you need them. If you don’t want to make your own chocolate flakes or if you’d like to try something different, you can also use cacao powder mixed with 20% icing sugar.

STEP 6: DIP AND ROLL
When the inside of the truffle is cold and hard, you can start the last phase of the truffle making. For dipping you need a bowl of tempered chocolate and a dipping fork. You can choose your dipping chocolate – I used milk chocolate for the first half and dark chocolate for the other half. Take only a few truffles out of the freezer to start with, you don’t want them to melt when they are sitting out. 5 to 10 truffles at a time is perfect.

Use your dipping fork to dip them in the chocolate and make sure the whole truffle is covered with chocolate before you take it out. Tap your dipping fork on the edge of the bowl so the superfluous chocolate can drip off. Then let the truffle fall into the chocolate flakes and roll it until the whole truffle is covered with flakes. Let it harden and repeat the process with the next one. If you have enough, you can put them in a box or on a tray.

SHARE THEM
There you go, beautiful, delicious and easy chocolate truffles for everybody to enjoy!

